メーカー品番 SC0022
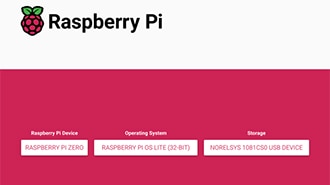
SBC 1.2GHZ 4 CORE 1GB RAM
Raspberry Pi

Sharing a network interface through an access point can be practical in many situations. The setup allows you to extend the Wi-Fi range and bring Ethernet-only devices online without investing in new networking gear. This article explains how you can turn a Raspberry Pi into an access point that shares the Ethernet connection via Wi-Fi, or shares the Wi-Fi via Ethernet.
Raspberry Pi OS introduced a new program for managing networking interfaces with Bookworm, called NetworkManager. This program offers both a GUI application for desktop users and a command-line interface (CLI) tool. The graphical UI lets users set up a wireless access point that shares the Ethernet connection over Wi-Fi in just a few clicks.
To get started, click the networking options button in the top-right corner of the desktop to display the Wi-Fi selection dropdown. Then, select the “Create Wi-Fi Hotspot” from the advanced options submenu:
 Follow the steps outlined in this screenshot to bring up the hotspot assistant window.
A new dialogue window asking for the access point SSID and password opens up. Enter the necessary details and click the create button. Note that doing so disconnects the Pi from the active Wi-Fi network and shares the Ethernet port via the wireless adapter, using the previously set name as the access point’s SSID.
 Enter the access point SSID and password using the assistant window.
While this method is effortless and suffices for most use cases, it also greatly reduces the number of options that users can configure. Although it’s possible to work around the limitations, using the CLI is typically recommended for more advanced users.
A networking interface represents the system’s physical hardware. This can be an Ethernet interface, the built-in Wi-Fi, or additional USB wireless adapters.
NetworkManager is a tool for configuring these hardware interfaces. It stores interface configuration data—such as the name, password, and channel—as connection profiles, also referred to as connections. These connections configure interfaces to behave a certain way. For example, to act as the shared interface in an access point. NetworkManager can bring these connections up (connect) or down (disconnect). Users can also delete the connections, which removes the configuration information associated with an interface. Doing so only removes the settings and does not inactivate the physical hardware.
When creating a hotspot, NetworkManager automatically sets up DHCP and NAT to share the data from one interface via another. DHCP is responsible for assigning IP addresses to clients. NAT ensures that reply packets transmitted over a shared physical interface return to the client they belong to, so they don’t end up in the wrong destination.
Before getting started, it’s recommended to clean up all old Wi-Fi and hotspot configurations to prevent NetworkManager from accidentally auto-connecting to an unwanted network after a reboot. Start by listing the existing connections:
nmcli connection show
The above command should result in a list similar to the one in the screenshot below:
 The command lists all stored connections, as shown in this screenshot. Wireless connections usually have the Wi-Fi SSID as their name.
You can then delete each connection that’s no longer needed using the following command:
sudo nmcli connection delete <connection_name>
Alternatively, you can also bring down the other connections and deactivate auto-connect if you want to keep the current configuration using the following commands:
sudo nmcli connection down <connection name>
sudo nmcli connection modify <connection name>
connection.autoconnect no
After deleting or deactivating the wireless connections, you can create a basic wireless access point that exposes the Ethernet port via Wi-Fi using the following command:
sudo nmcli dev wifi hotspot ifname wlan0 ssid "Pi Web" password
"abcd1234!"
This command automatically shares eth0 (the Ethernet port) over wlan0 (the wireless adapter) using the SSID “Pi Web” and the password “abcd1234!”. You can verify that the hotspot was created using:
nmcli dev wifi show-password
The hotspot is also added to the list of connections, which can be shown using nmcli connection show:
The hotspot is added to the list of connections, which is also where you can edit its settings, delete it, and change whether it’s active or not.
Similar to the other connections, the hotspot can be started, stopped, and auto-started using the following commands:
# Turn off:
sudo nmcli connection down <hotspot_name>
# Turn on:
sudo nmcli connection up <hotspot_name>

# Auto-start hotspot after booting:
# Note: requires reboot or connection reset (down + up) to apply sudo nmcli connection modify connection.autoconnect
yes
Note that creating a wireless access point automatically terminates all other wireless connections on the interface. It’s not possible to use the same Wi-Fi adapter to act as an access point and simultaneously connect the Pi to a wireless network.
The CLI tool allows changing almost all options of the stored connections, and the following command can be used to display a list of settings for each connection:
nmcli connection show <connection_name>
Doing so shows a list of all available options for the specified connection and the current value for each option:
 This screenshot shows the available options for the Ethernet adapter.
Use the modify command to change one of the available options:
sudo nmcli connection modify <connection_name> <setting_name> <new_value>
For example, connections can be renamed by changing their ID. It’s recommended to do so before adjusting any other settings, since the NetworkManager often creates connections with long or complicated names, such as the Wi-Fi SSID. Replacing the auto-generated names with custom ones can make them easier to remember and type.
Use this command to rename a connection:
sudo nmcli connection modify <old_name> connection.id <new_name>
The following example renames the Ethernet connection. Note that names with spaces must be enclosed in double quotes:
sudo nmcli connection modify "Wired connection 1" connection.id ethernet
You need to reboot the system or bring the connection down and back up to apply the settings. However, keep in mind that when accessing the Pi via SSH, bringing down the connection that’s used to access the Pi will result in a connection loss. In this case, rebooting is recommended to ensure that settings are applied correctly.
In some cases, it can be beneficial to share the wireless connection via Ethernet instead of the other way around. This approach is helpful in situations where only a wireless router is available, but the device that needs to be connected to the Internet does not have wireless capabilities.
Start by deactivating and deleting any previously created hotspots:
sudo nmcli connection down <hotspot_name>

sudo nmcli connection delete <hotspot_name>
Next, establish a connection to the target Wi-Fi network:
sudo nmcli device wifi connect <your_wifi_ssid> password

<your_wifi_password> ifname wlan0
Running this command establishes a connection and automatically assigns the network SSID as the connection name. It’s recommended to give the Wi-Fi and Ethernet connections names that are easier to type:
sudo nmcli connection modify <wifi_ssid> connection.id wifi

sudo nmcli connection modify "Wired connection 1" connection.id

ethernet
This step is optional, but the remaining comments use the simplified names for brevity. If you decide to rename the connections, do not bring them down and back up just yet. Instead, type the following commands to set the wireless connection as the source and the Ethernet as the sharing outlet:
sudo nmcli connection modify wifi ipv4.method auto

sudo nmcli connection modify wifi ipv6.method auto

sudo nmcli connection modify wifi connection.autoconnect yes

sudo nmcli connection modify ethernet ipv4.method shared

# Ignore IPv6 in this example; it could also be shared

# by changing "ignore" to "shared"

sudo nmcli connection modify ethernet ipv6.method ignore

sudo nmcli connection modify ethernet connection.autoconnect yes
Reboot the system after changing the options to apply them. Once booted, the Raspberry Pi automatically establishes a connection to the specified wireless network and shares the connection via its Ethernet port, allowing any other wired device connected to that port to access the Internet.
Thanks to the NetworkManager, introduced in Bookworm, setting up a wireless access point on a Raspberry Pi can be done through a graphical UI in a few clicks. However, the desktop environment only offers limited options, and setting up more advanced configurations is easier via the command-line interface.
The CLI lets users manage the connections created by NetworkManager. A connection is the program’s way of storing a set of options that it can quickly apply to the physical interfaces to connect or disconnect from known networks. When setting up a hotspot, NetworkManager creates a connection and automatically manages NAT and DHCP to share the default Ethernet adapter over the built-in Wi-Fi interface.
The NetworkManager CLI further allows users to reverse this sharing and make a Wi-Fi connection available through the Ethernet port. This approach can be practical when connecting a device without Wi-Fi, like a streamlined development board, to a wireless-only router.