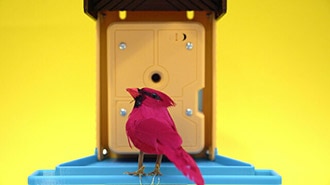
Laser-Cut Birdhouse from Poplar Plywood
2026-03-19 | By Kitronik Maker
License: See Original Project
Courtesy of Kitronik Maker
Guide by Kitronik Maker
This project is a brilliant base for further customisation. Change the designs on the walls, scale it, make a bracket to affix it to a wall, or a loop to hang it from a tree. The bird house is made of B/BB grade Poplar Plywood, which is an unfinished wood that will need finishing before it is used outside. Consider how you will do this once you’ve made it – will you paint and lacquer it? Use a stain or a varnish? You have many options!
This blog was written by Emma and is one of the 6 included projects in the Book of Projects Volume 5. Background Image by Raphael Rychetsky on Unsplash.
This make covers:
What did we use?
B/BB Poplar Plywood (600mm x 400mm) (32213)
PVA Glue
A Laser Cutter
Note:
*Price per student calculated based on the exVAT price of half of a 600mm x 400mm sheet of B/BB Grade Poplar Plywood.
The price may fluctuate slightly over time but was correct at the time of printing.
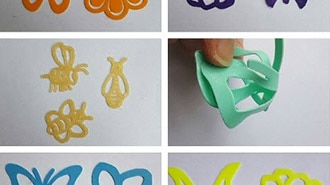
Step 1 – Check out the design files.
This DXF contains the design for this project. The diagram below shows you how to work with the file.
This design can tile two to a sheet of 600 x 400mm material. The black lines should be kiss-cut (a cut that doesn’t go all the way through the material), and then after that the green lines should be cut through all the way.
Step 2 – Laser cut the bird house.
As per the instructions in step 1, cut out the bird house. You could also use more traditional woodworking to cut out the panels, such as a jigsaw.
Step 3 – Attach the window and door frames and build the stairs.
Using PVA glue, stick the window and door frames around the window and door holes. Then stick together the stairs also using PVA, leaving the patterned areas visible.
Step 4 – Raise the walls.
Also using a little PVA glue to secure the joints, fit together the walls using the finger joints, and then slot the walls down into the base.
Step 5 – Attach the stairs.
Using PVA glue again, attach the stairs to the base plate beneath the door frame and against the wall.
Step 6 – Secure the roof.
Using the holes in the roof, attach them to the joints on the walls as shown, using PVA again to affix it in place.
Step 7 – Build the fence.
The fence is made of two shorter and two longer sections. It will only fit with the short lengths at the sides of the house, and the long ones at the front and back.
Step 8 – You’re finished!
B/BB Grade Plywood isn’t a finished material, so before putting it outside, you’ll want to consider how to finish your birdhouse. Whether you only varnish, or if you paint and seal the wood, this is an excellent opportunity to add some artistic flair!