Mfr Part # STM32F407VGT6J
IC MCU 32BIT 1MB FLASH 100LQFP
STMicroelectronics
License: Attribution Motors ARM mbed
Overview
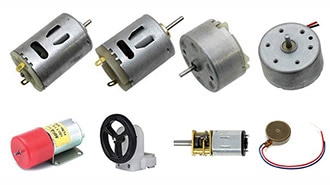
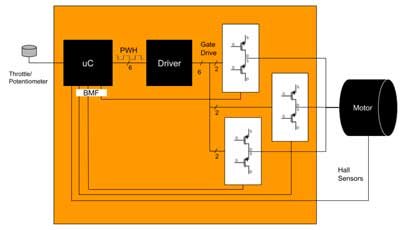
This project documents the full development of a custom BLDC motor controller PCB, from schematic capture to SMT assembly and testing.
Key Specifications
- MCU: STM32F407VGT6
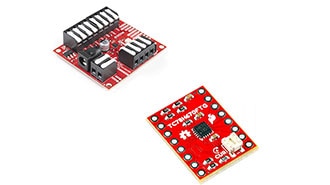
- Gate driver: DRV8301
- MOSFETs: IRFZ44N x6
- Current sensing: inline shunt resistor
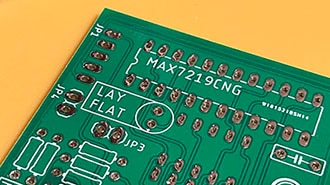
- PCB: 4-layer, 1.6mm FR4, HASL lead-free
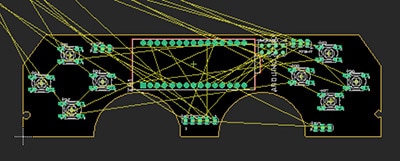
- Design tool: Altium Designer
Design Highlights
Power stage uses three half-bridge gate driver circuits with bootstrap capacitors for high-side gate drive. Dead time is configured in firmware to prevent shoot-through.
Current sensing via an inline shunt on each low-side leg feeds into the STM32 ADC. The FOC algorithm runs at 20kHz PWM frequency.
4-layer stackup: Signal / GND / PWR / Signal. A power plane provides a clean reference and low-impedance current path.
MOSFETs are placed on the bottom layer with exposed pads soldered to internal copper pours — no heatsink required up to 8A continuous.
Assembly Process
SMT assembly was performed in-house at our Tianjin facility using a DEK solder paste printer, a Yamaha YSM20 pick-and-place, an 8-zone reflow oven, AOI inspection, and a functional motor load test.
Testing Results
- Motor spins correctly in both directions under FOC control
- Phase current waveform confirmed sinusoidal at 5A load
- Max temperature 52°C at 8A / 24V continuous
- No shoot-through events over a 48h burn-in test
#ifndef __DRV8301_H
#define __DRV8301_H

#include "stm32f4xx_hal.h"

// ==================== 引脚定义(请根据你的硬件修改) ====================
#define DRV8301_CS_GPIO_Port   GPIOC
#define DRV8301_CS_Pin         GPIO_PIN_13
#define DRV8301_EN_GPIO_Port   GPIOB
#define DRV8301_EN_Pin         GPIO_PIN_12
#define DRV8301_FAULT_GPIO_Port GPIOD
#define DRV8301_FAULT_Pin      GPIO_PIN_2

// ==================== 寄存器地址 ====================
#define DRV_REG_STATUS1   0x00
#define DRV_REG_STATUS2   0x01
#define DRV_REG_CTRL1     0x02
#define DRV_REG_CTRL2     0x03

// ==================== CTRL1 常用配置位 ====================
#define PWM_MODE_6X       (1 << 5)      // 6x PWM 模式(独立高低边)
#define PWM_MODE_3X       (0 << 5)
#define OCP_RETRY         (0 << 10)     // 过流自动重试
#define OCP_LATCH         (1 << 10)
#define GAIN_10           (0 << 0)      // 电流放大倍数 10V/V
#define GAIN_20           (1 << 0)
#define GAIN_40           (2 << 0)

// ==================== CTRL2 常用配置位 ====================
#define DEADTIME_100NS    (0x0 << 8)    // 死区时间
#define DEADTIME_200NS    (0x1 << 8)
#define DEADTIME_400NS    (0x2 << 8)    // 常用值

// 函数声明
void DRV8301_Init(void);
uint16_t DRV8301_Read(uint8_t addr);
void DRV8301_Write(uint8_t addr, uint16_t data);
uint16_t DRV8301_ReadStatus1(void);
uint16_t DRV8301_ReadStatus2(void);
void DRV8301_EnableGate(void);
void DRV8301_DisableGate(void);
uint8_t DRV8301_CheckFault(void);

#endif
#include "drv8301.h"
#include <stdio.h>   // 用于串口打印(可选)

extern SPI_HandleTypeDef hspi3;   // CubeMX 生成的 SPI 句柄(改成你的)

// ==================== 底层 SPI 传输 ====================
static uint16_t drv8301_transfer(uint16_t txdata)
{
    uint8_t tx[2] = {(txdata >> 8) & 0xFF, txdata & 0xFF};
    uint8_t rx[2] = {0};

    HAL_GPIO_WritePin(DRV8301_CS_GPIO_Port, DRV8301_CS_Pin, GPIO_PIN_RESET);
    HAL_SPI_TransmitReceive(&hspi3, tx, rx, 2, HAL_MAX_DELAY);
    HAL_GPIO_WritePin(DRV8301_CS_GPIO_Port, DRV8301_CS_Pin, GPIO_PIN_SET);

    return (rx[0] << 8) | rx[1];
}

// ==================== 读寄存器 ====================
uint16_t DRV8301_Read(uint8_t addr)
{
    uint16_t cmd = (1 << 15) | ((addr & 0x0F) << 11);   // Read bit + 地址
    drv8301_transfer(cmd);          // 第一次发送命令
    return drv8301_transfer(0x0000); // 第二次读取数据
}

// ==================== 写寄存器 ====================
void DRV8301_Write(uint8_t addr, uint16_t data)
{
    uint16_t cmd = ((addr & 0x0F) << 11) | (data & 0x07FF);   // Write bit=0
    drv8301_transfer(cmd);
}

// ==================== 初始化 DRV8301 ====================
void DRV8301_Init(void)
{
    // 硬件复位时序
    DRV8301_DisableGate();
    HAL_Delay(10);
    DRV8301_EnableGate();
    HAL_Delay(10);

    // 配置 Control Register 1(6x PWM + 过流重试 + 10倍增益)
    DRV8301_Write(DRV_REG_CTRL1, PWM_MODE_6X | OCP_RETRY | GAIN_10);

    // 配置 Control Register 2(死区 400ns)
    DRV8301_Write(DRV_REG_CTRL2, DEADTIME_400NS);

    printf("DRV8301 初始化完成!\r\n");
}

// ==================== 状态读取 ====================
uint16_t DRV8301_ReadStatus1(void) { return DRV8301_Read(DRV_REG_STATUS1); }
uint16_t DRV8301_ReadStatus2(void) { return DRV8301_Read(DRV_REG_STATUS2); }

// ==================== 使能/关闭栅极驱动 ====================
void DRV8301_EnableGate(void)
{
    HAL_GPIO_WritePin(DRV8301_EN_GPIO_Port, DRV8301_EN_Pin, GPIO_PIN_SET);
}
void DRV8301_DisableGate(void)
{
    HAL_GPIO_WritePin(DRV8301_EN_GPIO_Port, DRV8301_EN_Pin, GPIO_PIN_RESET);
}

// ==================== 故障检测 ====================
uint8_t DRV8301_CheckFault(void)
{
    return HAL_GPIO_ReadPin(DRV8301_FAULT_GPIO_Port, DRV8301_FAULT_Pin) == GPIO_PIN_RESET;
}