Mfr Part # T050000
TINKERKIT BRACCIO (US.EU.UK.AU P
Arduino
License: General Public License Robot Kits Arduino
Robotic manipulators are essential in both industrial automation and hobby robotics. This step-by-step project shows you how to build an Arduino Robotic Arm with a 6-degree-of-freedom (6-DOF) robotic arm driven by servo motors and controlled by an Arduino microcontroller. You’ll learn mechanical assembly, wiring, Arduino programming, and real-time control through an interactive interface — ideal for makers, students, and robotics enthusiasts.
Below is a curated list of essential components available from DigiKey (or part examples if an exact match doesn’t exist). These parts form the backbone of your robotic arm.
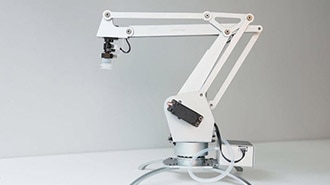
Arduino TinkerKit Braccio Robotic Arm Kit – Complete robotics arm kit including servos and controller shield (Arduino board not included)
External 5 V Power Supply (min. 4 A recommended for multiple servos)
Arduino Uno (If not included in your kit) — classic microcontroller board for running motion code
Breadboard & jumper wires — for prototyping and servo power distribution
Hobby servo motors (at least 6) — each joint uses one servo for motion (base rotation, shoulder, elbow, wrist pitch, wrist rotation, gripper)
Servo horns & mounting brackets — for attaching servos to printed or metal parts
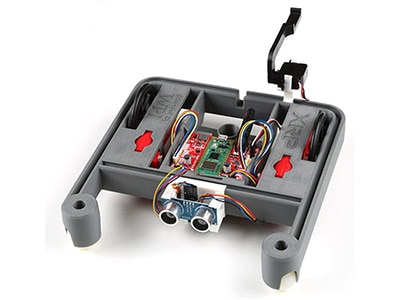
3D-printed arm parts or metal bracket kit (base, links, wrist mounts, gripper) — essential structure
Screws, nuts & bolts — mounting hardware
Screwdrivers, small pliers — assembly tools
Arduino IDE (for uploading control firmware)
Web browser with Web Serial API support (Chrome, Edge) for interactive controls
Tip: You may also choose a full metal 6-DOF arm kit from your inventory to simplify mechanical assembly.
Print or obtain arm segments: base, shoulder link, elbow link, wrist modules, and gripper. Make sure the pieces fit snugly around servo mounts and rotate freely.
Insert one servo into each joint housing (base, shoulder, elbow, wrist tilt, wrist rotation, gripper).
Use servo horns to attach the output shaft to the arm linkages.
Ensure neutral (90°) alignment for all servos before tightening screws.
A good neutral position ensures smoother motion and fewer wiring issues during testing.
Servos can draw more current than the Arduino’s onboard regulator can safely provide — always use an external 5 V supply for servos and share a common ground with the Arduino.
Connect all servo power (red) and ground (black) lines to the external 5 V supply.
Connect all servo signal (PWM) wires to PWM-capable pins on the Arduino.
Connect the ground of the external supply to the Arduino ground.
Below is a simplified version of the Arduino sketch that initializes servos and sets them to a neutral pose:
#include <Servo.h>

Servo baseServo, shoulderServo, elbowServo, wristRotServo, wristTiltServo, gripperServo;

void setup() {
  baseServo.attach(3);
  shoulderServo.attach(5);
  elbowServo.attach(6);
  wristRotServo.attach(9);
  wristTiltServo.attach(10);
  gripperServo.attach(11);

  // Set neutral positions
  baseServo.write(90);
  shoulderServo.write(90);
  elbowServo.write(90);
  wristRotServo.write(90);
  wristTiltServo.write(90);
  gripperServo.write(90);
}

void loop() {
  // Placeholder: Real application will read commands (serial/web) to move servos
}
📎 Save this as robotic_arm.ino and upload using Arduino IDE.
You can build a simple web interface using HTML/JavaScript that uses the Web Serial API to send servo position commands to your Arduino in real time.
This allows slider-controlled motion for each servo — great for testing and demos.
Key features your interface can include:
✔ Individual servo sliders
✔ “Home” position button
✔ Saved movement presets
✔ Live feedback display
Before running full motion sequences:
➤ Ensure all servos are powered correctly and not overheating.
➤ Test each joint individually via simple Arduino sketches.
➤ If servos jitter or reset, check your power supply rating — most issues stem from low current delivery.
🔹 Servo control using Arduino PWM
🔹 Multi-axis mechanical movement
🔹 Real-time control via web interface
🔹 Power distribution and wiring best practices
🔹 Practical robotics fundamentals
Once your arm is functional, here are ways to take it further:
Add Bluetooth or Wi-Fi control — link to a mobile app
Camera integration for basic vision tasks
Inverse kinematics support for smooth motion planning